Have you ever dreamt of having gorgeous wood or stone floors but hesitated due to the cost or installation complexity? Well, fret no more! Laminate flooring offers a fantastic solution, providing the look you love without breaking the bank or requiring professional installation.
Think of laminate as a genius disguise artist. It’s a synthetic marvel made up of multiple layers, cleverly crafted to resemble the rich textures of wood or the sleek elegance of stone. But unlike its natural counterparts, laminate boasts incredible advantages. It’s surprisingly affordable, tough enough to handle busy households, and surprisingly easy to install – perfect for weekend warriors looking to add a touch of magic to their homes.
Now, to keep your laminate floors looking their best for years to come, a little TLC (Tender Loving Care) goes a long way. Regular cleaning is key! Just like your favorite outfit, laminate thrives with proper maintenance. By incorporating some simple cleaning routines, you’ll prevent dirt and grime from building up, and keep those unwanted scratches and scuffs at bay. Regular deep cleaning every few months is also recommended.
With this routine, you can be confident that your laminate floors will look their best during an end-of-lease cleaning inspection. However, even with regular care, occasional cleaning challenges can arise. If you encounter any stubborn stains or grime leading up to your move-out, fear not! Here’s a helpful resource on end of lease floor cleaning tips that will provide you with all the information you need to tackle those issues effectively and ensure your laminate floors meet the standards for getting your full bond back.
So, are you ready to explore the wonderful world of laminate flooring? Stay tuned as we delve deeper into the world of laminate care, equipping you with the knowledge and tools to keep your floors looking stunning for years to come!
Essential Cleaning Tools
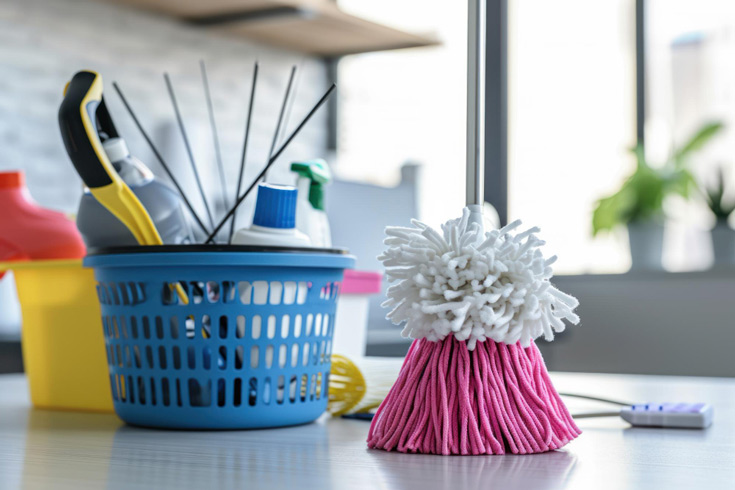
Now that we’ve unveiled the beauty of laminate floors, let’s get down to business – keeping them looking their best! Here’s the essential cleaning toolkit you’ll need to tackle the job:
- Microfiber Mop: This is your trusty warrior against dust and grime. Microfiber’s gentle yet effective grip attracts dirt and debris without leaving a scratch on your laminate’s surface. Think of it as a magnet for mess, keeping your floors sparkling clean.
- Soft-Bristled Broom or Vacuum with Hard Floor Attachment: Before you unleash the mop, it’s important to clear away loose dirt and dust. A trusty broom with soft bristles or a vacuum cleaner with a hard floor attachment will do the trick. This quick pre-clean ensures your mop tackles tougher grime, not just surface-level dust bunnies.
- Bucket: Every hero needs a trusty sidekick, and for your cleaning adventures, that sidekick is a simple bucket. It’ll hold your cleaning solution, ready to be mixed and deployed to banish dirt from your laminate kingdom.
- Cleaning Solution: Now, here’s where things get interesting. You have a few options for your cleaning cavalry:
- Commercial Laminate Floor Cleaner: This is the knight in shining armor specifically designed for laminate floors. It’s formulated to clean effectively without harming the surface, keeping your floors safe and sound.
- Diluted Vinegar Solution: For a more natural approach, a solution of white vinegar diluted with water can be a budget-friendly option. Just remember, a little goes a long way – too much vinegar can dull the floor’s shine.
- Mild Dish Soap & Water: In a pinch, a mild dish soap diluted in water can work wonders. However, be sure to use a very small amount of soap, as excess suds can leave a film on the floor.
Remember, when choosing your cleaning solution, “gentle” is the keyword. Harsh chemicals are a big no-no for laminate floors, so always stick with products designed specifically for this type of flooring.
- Microfiber Cloths (Optional): While not essential for everyday cleaning, microfiber cloths can be handy for spot cleaning spills or wiping down surfaces. Their super-soft nature ensures they won’t scratch your laminate like traditional cloths might.
Now that you’re armed with the right tools, get ready to conquer dirt and grime! In the next topic, we’ll delve into the art of cleaning laminate floors, providing step-by-step instructions to keep your floors looking magnificent.
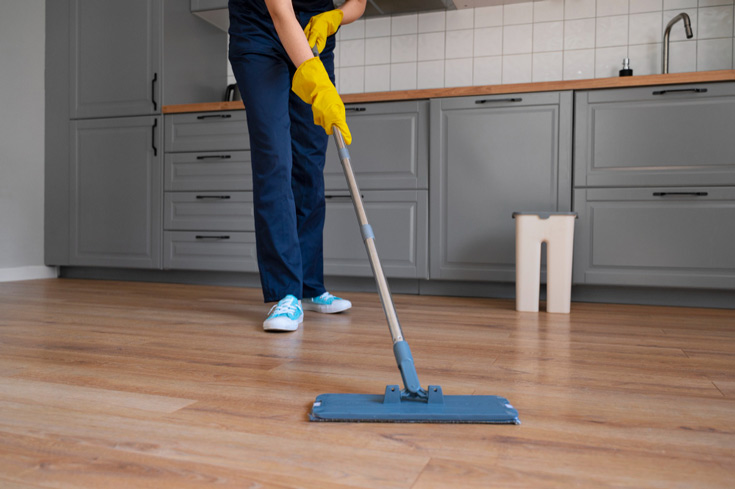
Regular Cleaning Routine
Now that you’ve assembled your cleaning arsenal, let’s put it to good use and establish a regular routine to keep your laminate floors looking their best! Here’s a battle plan to banish dust bunnies and leave your floors sparkling clean.
Step 1: Banish the Loose Dirt:
Before you unleash the mop, it’s all about clearing away the enemy scouts – loose dirt and debris. Remember, these tiny trespassers can wreak havoc, leaving scratches on your beautiful laminate surface. To send them packing, grab your trusty soft-bristled broom or a vacuum cleaner with a hard floor attachment. Give your floors a good once-over, focusing on corners and baseboards where dust bunnies love to hide.
Step 2: Mopping Up the Mess:
Now that the battlefield is prepped, it’s time to deploy the mop! Here’s how to create your cleaning solution:
- Warm Water is Key: Fill your bucket with warm water – not hot! Hot water can damage the laminate, so warm is the perfect temperature.
- Choose Your Weapon: As discussed earlier, you have a few options for your cleaning solution:
- Commercial Laminate Floor Cleaner: Follow the manufacturer’s instructions for dilution.
- Diluted Vinegar Solution: Mix a cup of white vinegar with a gallon of warm water. Remember, less is more – too much vinegar can dull the shine.
- Mild Dish Soap & Water: In a pinch, a few drops of mild dish soap in a gallon of warm water will suffice. But be very sparing – excess suds can leave a film on the floor.
- Wring it Out Well: This is crucial! Your mop should be damp, not dripping. Excessive moisture is the enemy of laminate floors, so wring out your mop thoroughly before mopping.
Step 3: The Art of the Mop:
Now for the mopping itself! Here’s how to conquer every inch of your laminate kingdom:
- Start from the Back and Work Your Way Forward: This ensures you’re not accidentally trapping dirty mop water in corners as you clean.
- Move with Grace: Don’t scrub or push down too hard with the mop. Laminate is a gentle soul and doesn’t need aggressive cleaning. Gentle strokes are all you need to remove dirt and grime.
Step 4: Embrace the Power of Drying:
Once you’ve finished mopping, it’s vital to remove any remaining moisture. Here’s where your trusty microfiber cloth comes in! Go over the entire floor surface with the microfiber cloth, buffing away any excess water. Remember, laminate and water aren’t the best of friends. Leaving moisture on the floor can lead to warping and water damage, so drying is an essential final step.
Congratulations! You’ve successfully completed your regular laminate floor cleaning routine. By following these steps and maintaining a consistent cleaning schedule, you’ll keep your laminate floors looking beautiful and protected for years to come.
Deep Cleaning (Optional)
Now that you’ve mastered the art of regular cleaning, let’s delve into the occasional deep clean – a treatment every laminate floor deserves every 2-3 months. Think of it as a spa day for your floors, reviving their luster and removing any built-up grime that regular mopping might miss.
Here’s how to deep clean your laminate floors and bring back their sparkling glory:
Step 1: Time for a Deeper Dive:
Regular mopping tackles everyday dirt and debris, but deep cleaning goes a step further. It targets those stubborn stains and embedded dirt that can accumulate over time, leaving your floors looking a bit dull. Deep cleaning helps remove these unwanted guests, restoring the original beauty of your laminate.
Step 2: Choose Your Deep Cleaning Weapon:
For deep cleaning, ditch the homemade solutions and grab a store-bought laminate floor cleaner specifically formulated for deep cleaning. These cleaners are designed to tackle tougher messes without harming the laminate surface.
Step 3: Manufacturer Magic:
Every cleaning product is unique, so it’s important to follow the manufacturer’s instructions carefully. Dilution ratios, application methods – these details can vary depending on the brand. Reading the instructions ensures you’re using the product safely and effectively to achieve the best results.
Step 4: A Patch Test is Worth a Thousand Regrets:
Before unleashing the deep cleaner on your entire floor, here’s a wise precaution: conduct a patch test! Apply a small amount of the cleaning solution to an inconspicuous area of the floor, like a corner in a closet. This allows you to check for any discoloration or adverse reactions before proceeding with the entire cleaning process.
Step 5: Embrace the Damp Mop, Not the Soggy One:
Similar to regular cleaning, you don’t want to saturate your floor with moisture. Deep cleaning requires a slightly damp mop, not a dripping one. So, wring out your mop thoroughly before applying the cleaning solution.
Step 6: Deep Clean Like a Pro:
Once you’ve prepped your mop and solution, follow the manufacturer’s instructions for application. Generally, you’ll want to work in sections, applying the cleaning solution and mopping according to the product’s recommendations.
Step 7: Drying – Your Loyal Companion:
Just like with regular cleaning, drying is crucial after deep cleaning. Remember, excess moisture is a no-go for laminate floors. Use a clean, microfiber cloth to buff away any remaining solution and ensure your floor is completely dry.
By following these steps and deep cleaning your laminate floors periodically, you’ll be extending their lifespan and keeping them looking their absolute best for years to come!
Dealing with Stains
Life happens, and sometimes spills can leave unsightly stains on your beautiful laminate floors. But fear not, stain removal doesn’t have to be a mystery! Here’s how to tackle those tricky spots:
Act Fast: The Early Bird Gets the Stain!
The golden rule of stain removal is to address spills immediately. The quicker you act, the easier it is to prevent the stain from setting in and becoming permanent. The longer a stain sits, the harder it is to remove. So, blot up any spills as quickly as possible to minimize damage.
Vinegar to the Rescue (for common stains):
For everyday culprits like food spills, beverage stains, or even pet accidents, a trusty cleaning solution of vinegar and water can be your hero. Vinegar is a natural cleaning powerhouse that’s gentle on laminate floors yet effective at lifting stains. Here’s how to make your cleaning solution:
- Mix a cup of white vinegar with a gallon of warm water. Remember, a little goes a long way – too much vinegar can dull the floor’s shine.
Dampen, Don’t Drench:
Now, grab your trusty microfiber cloth. Dip it into the vinegar solution, wring it out thoroughly to remove excess moisture, and then gently blot the stain. Don’t scrub – scrubbing can actually spread the stain and make it worse. Just be patient and keep blotting until the stain lifts.
Test Before You Tackle:
Before tackling the stain head-on, here’s a wise precaution: conduct a patch test! Apply a small amount of the vinegar solution to an inconspicuous area of the floor, like a corner in a closet. This allows you to check for any discoloration or adverse reactions before using the solution on the visible stain.
Remember, different stains may require different solutions. If the vinegar doesn’t work or you’re dealing with a tougher stain, it’s best to consult a professional floor cleaner for guidance on the most appropriate cleaning method.
By following these tips and acting quickly, you’ll be well on your way to conquering stains and keeping your laminate floors looking their best!
Cleaning Don’ts: Keeping Your Laminate Floors Safe
Laminate floors are fantastic – beautiful, durable, and relatively easy to care for. But, just like any good relationship, there are a few things to keep in mind to keep them happy and healthy. Here are some cleaning practices to avoid when caring for your laminate floors:
- Harsh Chemicals are a Big No-No: Those abrasive cleaners and oil-based products might be tempting for tough messes, but resist the urge! Laminate is a gentle soul, and harsh chemicals can damage the surface, leaving behind scratches, streaks, or even discoloration. Stick to gentle cleaning solutions specifically designed for laminate floors – they’ll get the job done without causing any harm.
- Beware the Flood Zone: Laminate and water don’t exactly see eye-to-eye. While mopping is essential, excessive water is a big no-no. Flooding the floor can cause moisture to seep into the seams, leading to swelling, warping, or even delamination (think of it as the floor peeling apart at the seams – not a pretty sight!). Always use a damp mop, not a soaking wet one, and wring it out thoroughly before mopping.
- Steam Mops? Maybe Not: While steam mops can be lifesavers for some floor types, laminate isn’t a fan. The high heat and moisture can damage the surface, causing the adhesive layers to separate or the floor to warp. Instead, stick to your trusty damp mop and gentle cleaning solution for a safe and effective clean.
Remember, prevention is key! By avoiding these cleaning faux pas, you’ll be well on your way to keeping your laminate floors looking beautiful for years to come. In the next chapter, we’ll explore some bonus tips and tricks to take your laminate floor care to the next level!
Bonus Tips to Protect Laminate Floors
Now that you’ve mastered the art of cleaning your laminate floors, here are some bonus tips to keep them looking their best for even longer:
- Doormats: Your Ally in the Dirt War: Doormats are like loyal soldiers in the battle against dirt and debris. Placing doormats at entry points helps trap dirt and grime from shoes before it gets a chance to be tracked onto your beautiful laminate floors. The less dirt and grit that enters your home, the less wear and tear your floors will experience.
- Pampered Paws for Happy Floors: Our furry friends bring us joy, but their nails can wreak havoc on laminate floors. Regularly trimming your pet’s nails helps minimize scratches, especially in those high-traffic areas. Think of it as a preventative measure to keep your floors looking pawsome (pun intended!) for years to come.
- Felt Pads: The Invisible Protectors: Furniture can leave unsightly scratches and scuffs on laminate floors. Here’s where felt pads come in – these little lifesavers act as a protective barrier between your furniture legs and the floor. By reducing friction, they prevent scratches and keep your floors looking flawless. Remember, prevention is always better than cure!
- Cleaning Supplies: Keep Them Fresh: Just like your favorite workout gear, your cleaning cloths and mop heads need some TLC too. Worn-out cloths can leave streaks or even damage the floor’s surface. Make sure to replace your cleaning cloths and mop heads regularly to ensure effective cleaning and avoid any unwanted marks on your laminate floors.
By following these additional tips, you’ll be well on your way to becoming a laminate floor care champion! Your floors will thank you for it by staying beautiful and protected for years to come.
Conclusion
So there you have it! With a little know-how and some simple cleaning practices, you can keep your laminate floors looking stunning for years to come. Remember, the key is consistency – regular cleaning is your best friend. Sweeping or vacuuming to remove loose dirt and debris, followed by gentle mopping with a laminate-safe cleaning solution, is all it takes to maintain a clean and beautiful surface.
Always keep in mind that harsh chemicals, excessive water, and abrasive cleaners are the enemies of laminate floors. Sticking to gentle cleaning methods and avoiding these no-nos will ensure your floors stay happy and healthy.
Don’t forget the bonus tips! Doormats, trimmed pet nails, and felt furniture pads may seem like small things, but they can make a big difference in protecting your laminate floors from scratches and wear-and-tear.
By incorporating these cleaning routines and preventative measures, you’ll be well on your way to becoming a laminate floor care extraordinaire! So go forth and conquer dirt and grime, all while keeping your laminate floors looking their absolute best.